Showing posts with label sewing. Show all posts

Wednesday, July 15, 2020

Wear a Mask

The family's favorite mas is the octagon/3D/origami mask. I thought I'd share how I make it. Please note- I am a lazy seamstress and cut corners where I can. I don't iron if I don't have to, I pin less than most people, and I rarely baste. If you want to iron/pin/baste more than I do, please help yourself.

First, the pattern. Open and print at 100% the pattern below. It has brief instructions on it as well. The 1 inch square should measure 1 inch. If it's bigger, your mask will be bigger. If it's smaller, your mask will be smaller. Whether that's good or bad depends on your face, I guess.


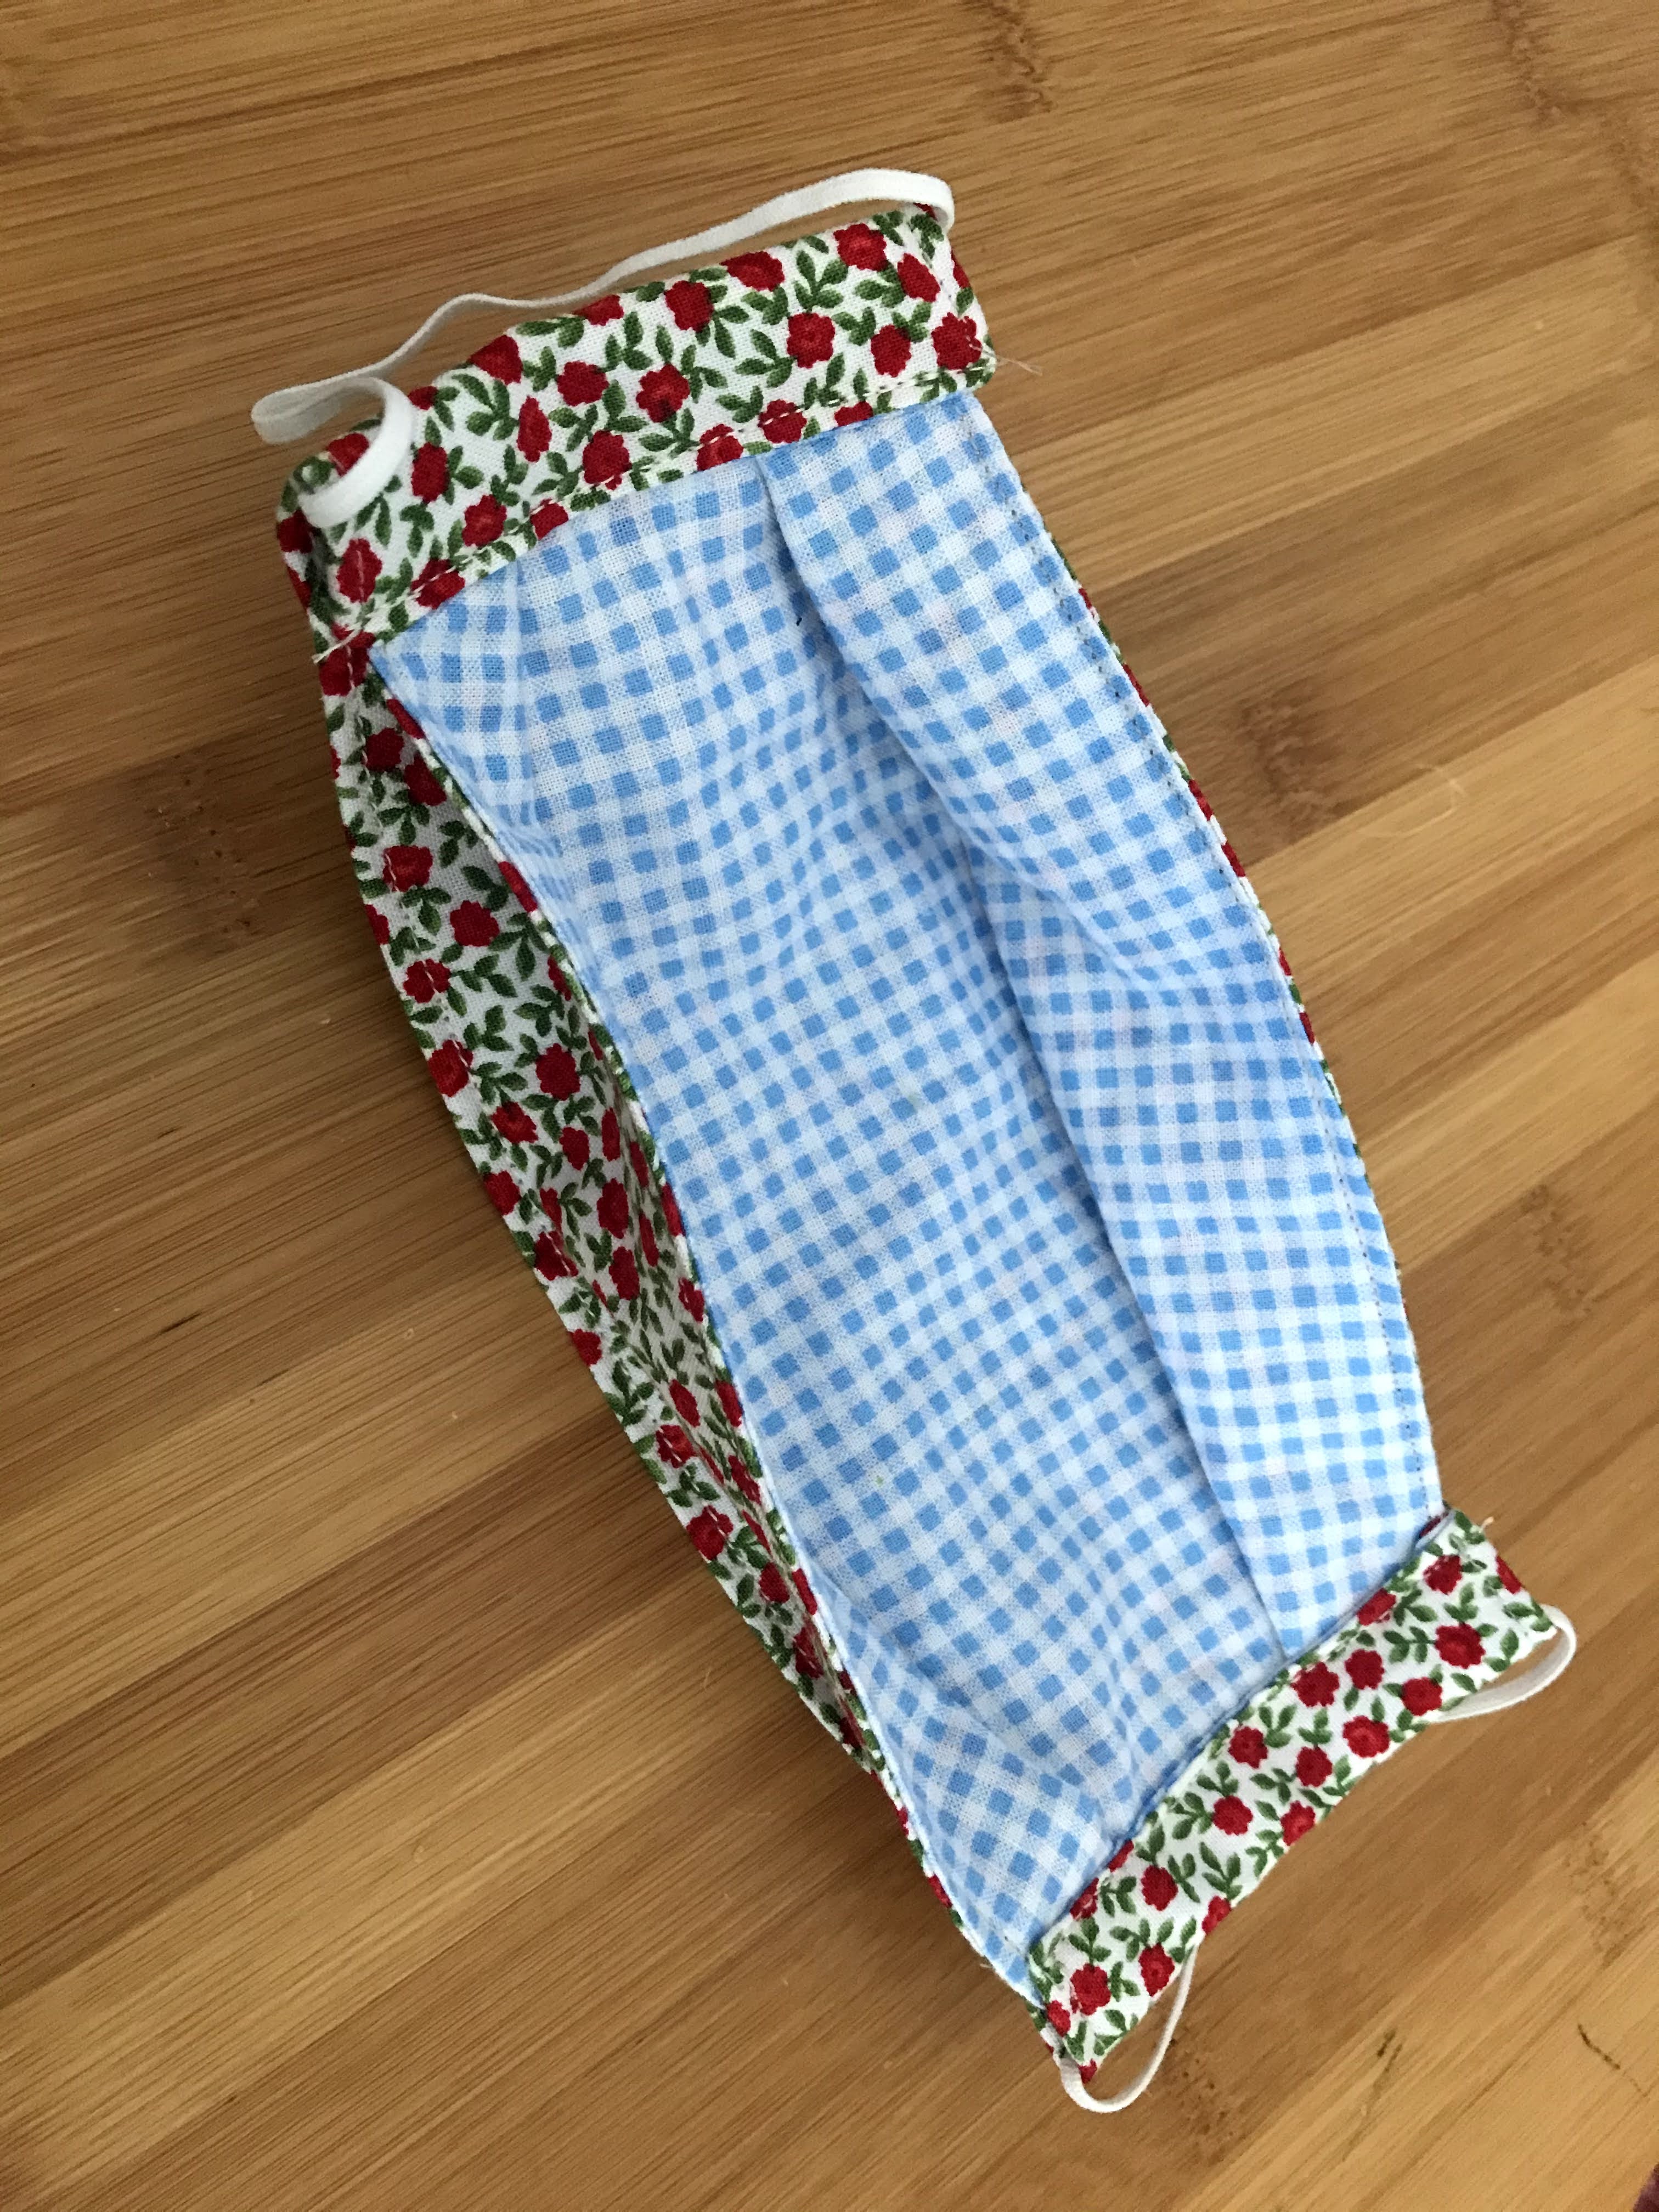
You are going to need to cut out one inner and one outer with the same pattern. You can use the same fabric, but some people prefer different fabrics just to make it easy to tell which side of the mask is out and which one is in.


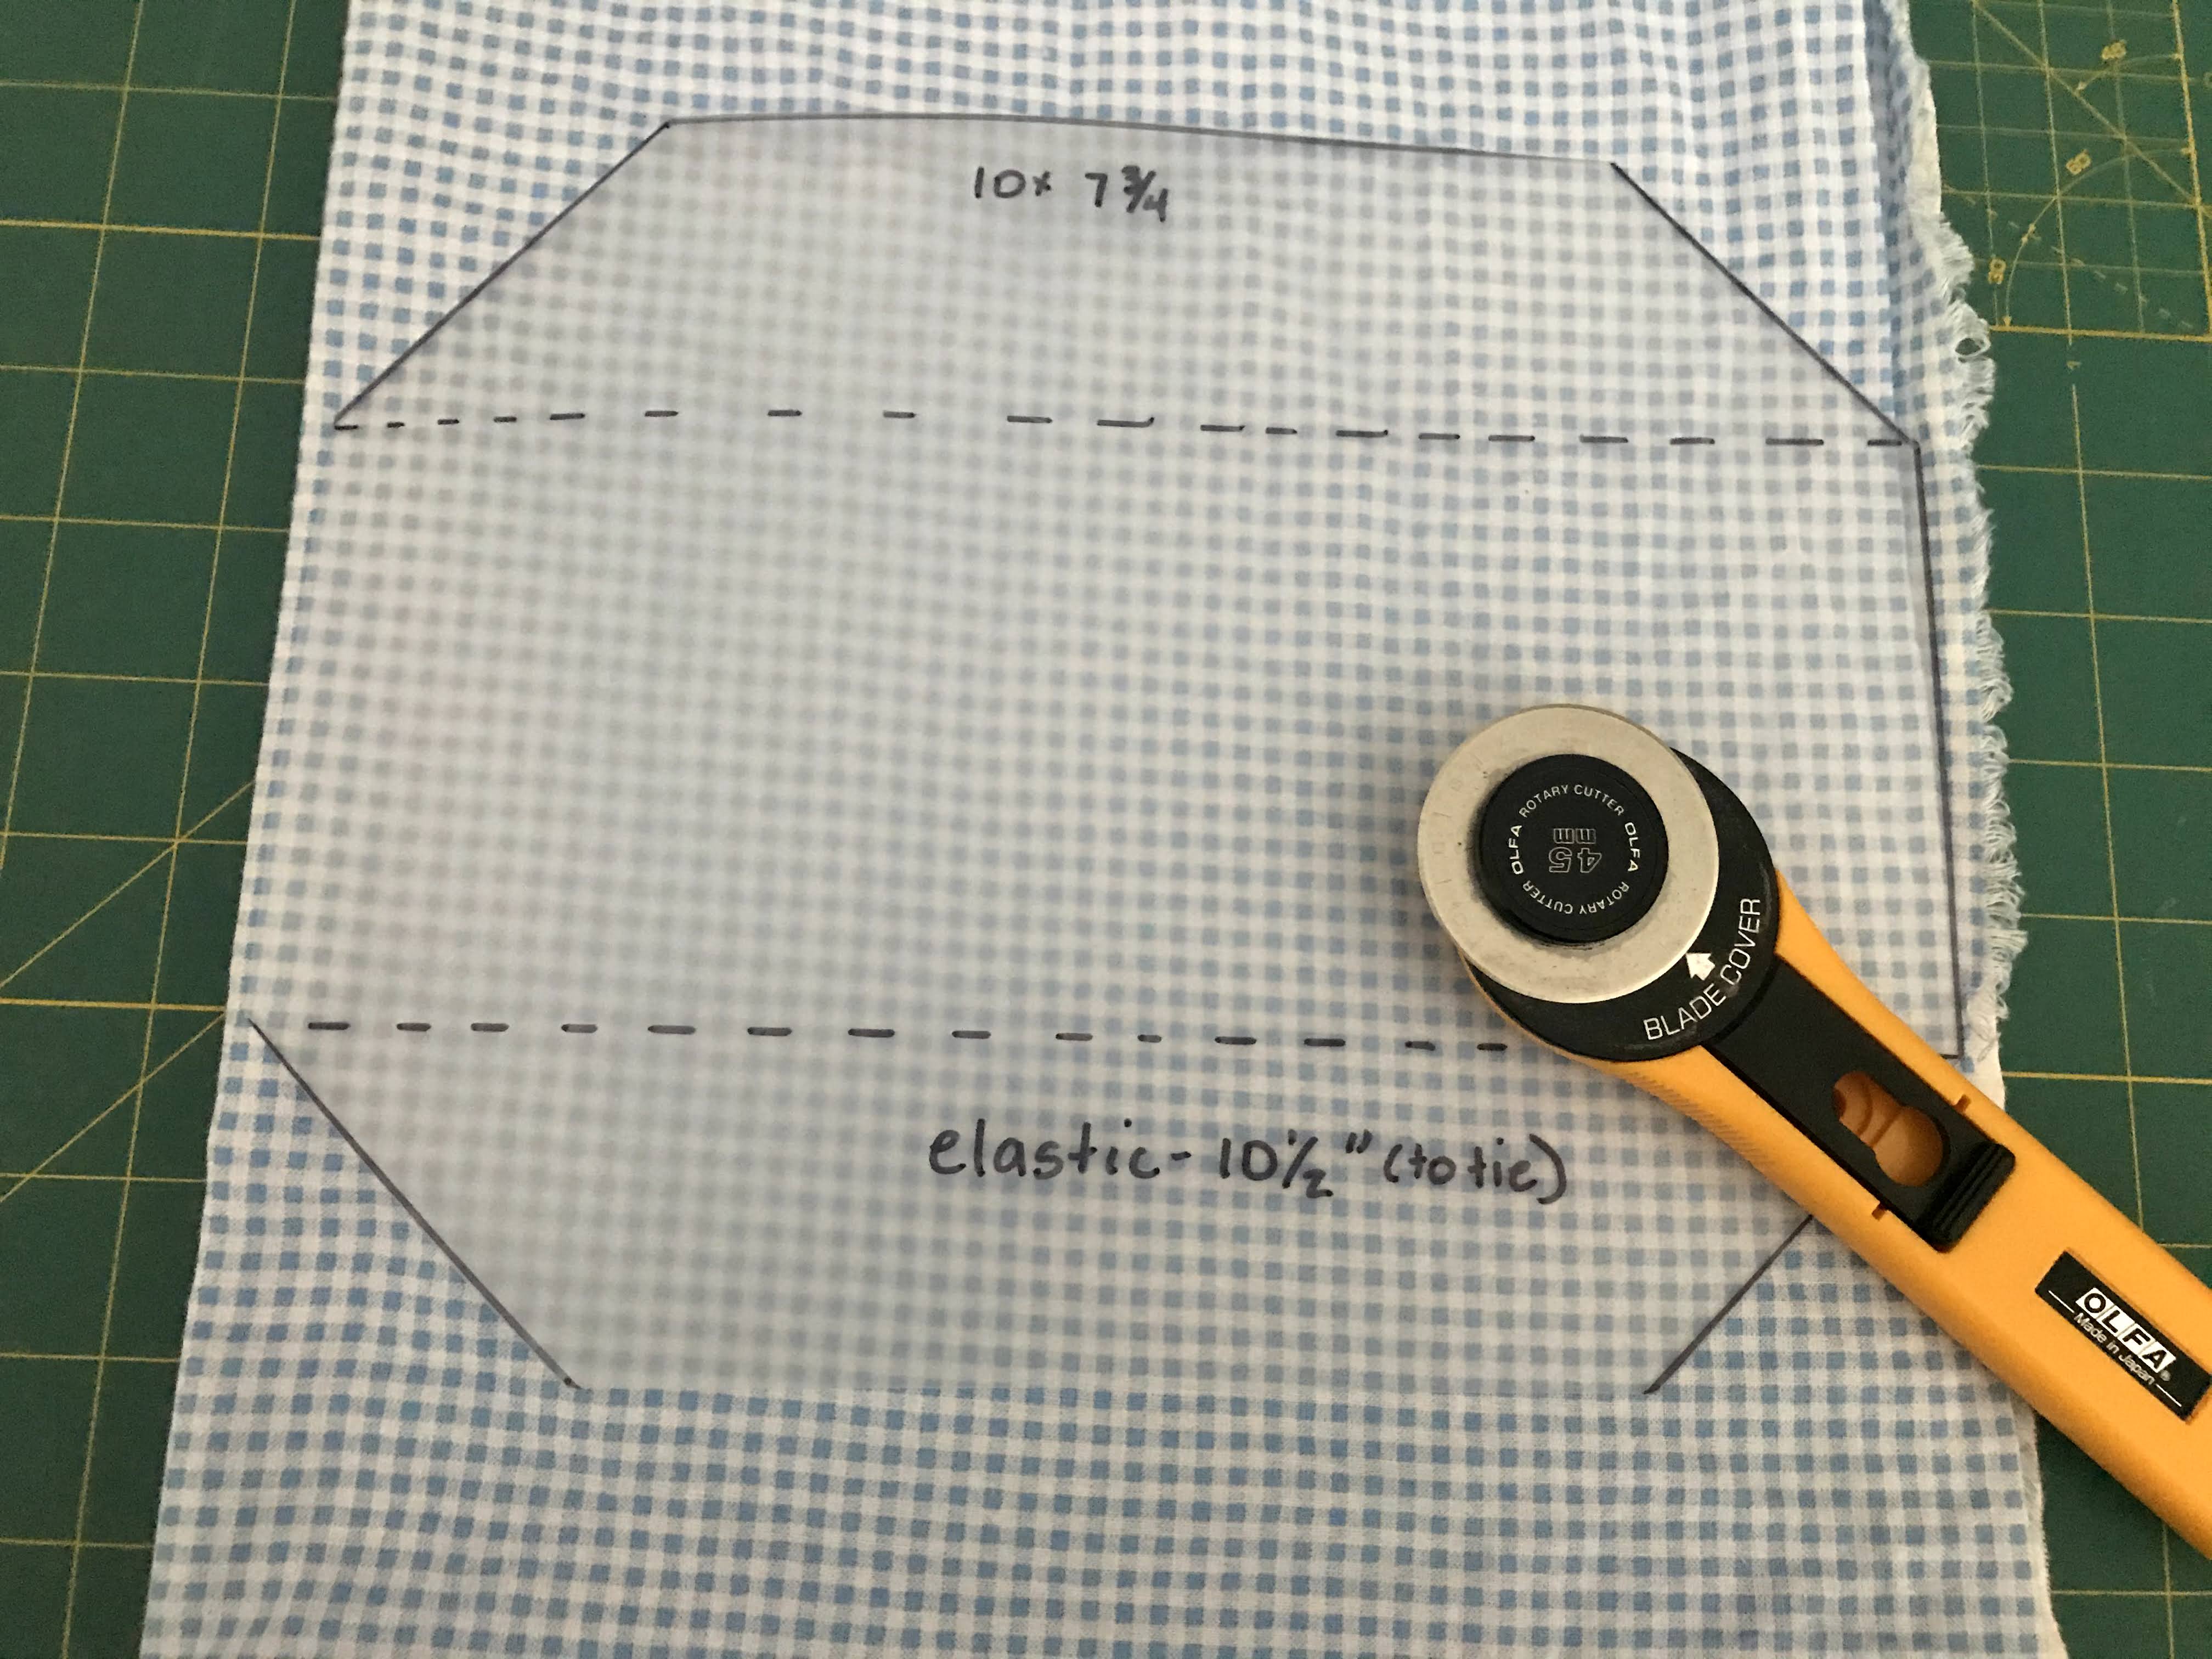
I have transferred the pattern to a plastic sheet so that it's more durable. I use a rotary cutter and generally cut 4 pieces at a time.

After your pieces are cut, put the outer and inner layers right sides together. You're going to be stitching all of the way around, leaving a 3-4 inch gap on the long side on the bottom.


 After sewing around, trim the corners and turn right side out. Poke corners to get them nice and crisp. You can iron, if you'd like. Make sure the fabric in the gap turns under so that when you topstitch, it looks just like the top side.


Topstitch on the long edge on the top and bottom approximately 1/8" from the edge. This will close up the gap you left for turning.

Fold the top down and the bottom up towards the center of the mask. Clip in place. Topstitch approximately 1/8 inch from the edge. This will help give the mask shape and structure.


Here's the trickiest part of the mask. You're going to be forming the channels for the elastic and folding the nose and chin panels to help give the mask it's 3D shape.

Cut the elastic to your desired length. I use 10 1/2 inches. My daughter likes it shorter, my husband likes it longer. Put the elastic about 1/2 inch from the end of the mask and fold over. Clip it in place. Keep the elastic as close to the fold as you can. This will keep you from sewing over it (hopefully). Repeat on the other side.


Fold the chin side down so that the angled part is parallel to the elastic channel. It should go right UNDER the elastic channel. It will pull up part of the mask. That's ok and what you want it to do. Pin in place. Repeat for the other 3 corners. Sew as close to the edge of the elastic channel as possible, but making sure you catch the edge of the chin or nose folds, backstitching at the beginning and end.


 Trim all the threads. Tie the elastic with and overhand knot and pull it into the elastic channel. You are ready to go!


Saturday, June 27, 2015

Peasant Blouse

It's been hot lately. I've adapted to my beach environment and go melty when it's in the 80s...and heaven forbid, 90s. I love sewing, but I don't often sew clothes for myself- that would involve measuring and fitting. I prefer Halloween costumes for the kids. Like I've said it's been hot. And I printed out the pattern for MellySew's peasant blouse over a year ago. Then I found some great voile flowered fabric at my local fabric store (cheap!).

So, I taped together the pattern. And cut out the pieces. And was disappointed that the back and the front were on top of each other (but it was a free pattern, so I got over it). Then, I realized that there were no sizes on the pattern. Hmmm. I usually wear an XL and I'm taller than the average bear. Things that say one size don't always fit me. I check the blog and there's no size, but it warns that since it's free you get the size that fits the writer. Ok.

Turns out I have a blouse that's a similar style. I measure the blouse and measure the pattern. The pattern is much smaller than my blouse. Good to know before cutting the pattern. I added 2 inches to the middle of the blouse where the fold line is, cut the sleeves down the middle and added 2 inches, and added about 3 inches to the bottom of the pattern (see tall above, no one wants to flash their belly button on accident).

Got it cut out and sewn. Make an elastic casing and threaded 1/8 inch elastic around the top. Went to try it on. It cut into my arm pits. Badly. Oops. I'd added to the width of the blouse, but not the depth in the arm area. The good news is that this takes away fabric rather than adding it, so I could fix my new blouse. I cut the bottom curve of the arm deeper on both the sleeve and shirt, then sewed that area back up. Much better!

After wearing this blouse for a  time or two, I feel like I'm channeling my mother in law. She had a very similar blouse she used to wear in hot weather, but I didn't really remember that until I had made my own.

I recently wore this top on a trip to an amusement park. It was nice and cool, but I forgot to put sunscreen on my neck and inside shoulders...because they're usually covered with a t-shirt. Oops. The neckline also got pulled around with my backpack. I'm not sure I'd wear it to an amusement park again, but it'll be great for almost anywhere else.